Please see my other Database Development articles.
Managing Database Change
While the xSQL package also comes with xSQL Object Compare, an impressive tools for managing changes between database instances, this article will focus solely on the product used for managing data changes, xSQL Data Compare.
Produced by xSQL, xSQL Data Compare represents a robust application primarily geared for managing change in data between database instances.

Perhaps, one of the most common tasks of a dba supporting an OLTP system is maintain data concurrency between instances. Such an essential duty require having a robust, highly configurable tool to remove most if not all of the tasks prone to user error.
For example, while isolating records with differences is certainly helpful to the dba, executing changes to database records without causing unwanted changes to the schema, changing the wrong record or fields, and providing the ability to quickly construct rollback scripts all make this tool the dba’s best friend.
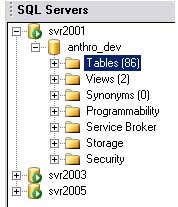
The interface is very intuitive and easy to use. For example, the first pane you’ll see on the left displays a list of existing instances into which you may add additional databases.
In this view, you may browse specific objects, create necessary scripts, or perform other necessary tasks before promoting data changes.
In addition to adding desired instances for comparison and promotion, xSQL Compare provides the ability to work with a snapshot of the database.

Once instances for comparison have been configured, you simply specify which fields should be used for comparison, a value to be used as a “WHERE” clause, and view a sample of the data found if desired.
Upon selecting the “Validate” button on the clause, it will present you with statistics regarding the expected outcome.

Once you’ve execute the comparison, you’ll see three tabs: Different, Left, and Right rows.
The “Different Rows” tab is what you’d expect, those rows that exist in both instances, but contain differing data.
The remaining two tabs represent those rows missing in either the first (“Left”) or last (“Right”) instance.
Also, you’ll be presented with a snapshot of data found in all three tabs.

Once you are satisfied with the expected outcome of your configured data promotion, you may elect to create a “rollback” script in the event of unwanted data promotion. This script is a safety mechanism to ensure that any changes may be reversed fairly easily.
To create such a script, simply click the link for the “Left” instance, the instance that is used for source comparison.
Once the script window is displayed, simply saved the contents of the script to a location you will remember.
Now, to execute that data promotion, click the link for the “Right” instance, or the target for promotion and then click the “Execute” link.

